背景
评论是博客中一个必要的功能,除非你想写个博客,然后不允许别人逼逼那种。
前两天刚搭好自己的Github主页,所以迫不及待就想弄个评论功能。网上推荐蛮多评论插件了,我最终选择的是Gitalk,在线示例请见链接
Gitalk 是一个基于 GitHub Issue 和 Preact 开发的评论插件。让我最终选择他的是因为Gitalk 使用的是Github Issue 的API,不依赖任何第三方平台,只要Github不倒闭,评论系统就不会出问题。当然如果Github倒闭,Github主页就不复存在了。
搭建
创建Github OAuth Application
这里面要特别说明一下,我第一次接触的时候,一直以为是GitHub App,页面如下图:
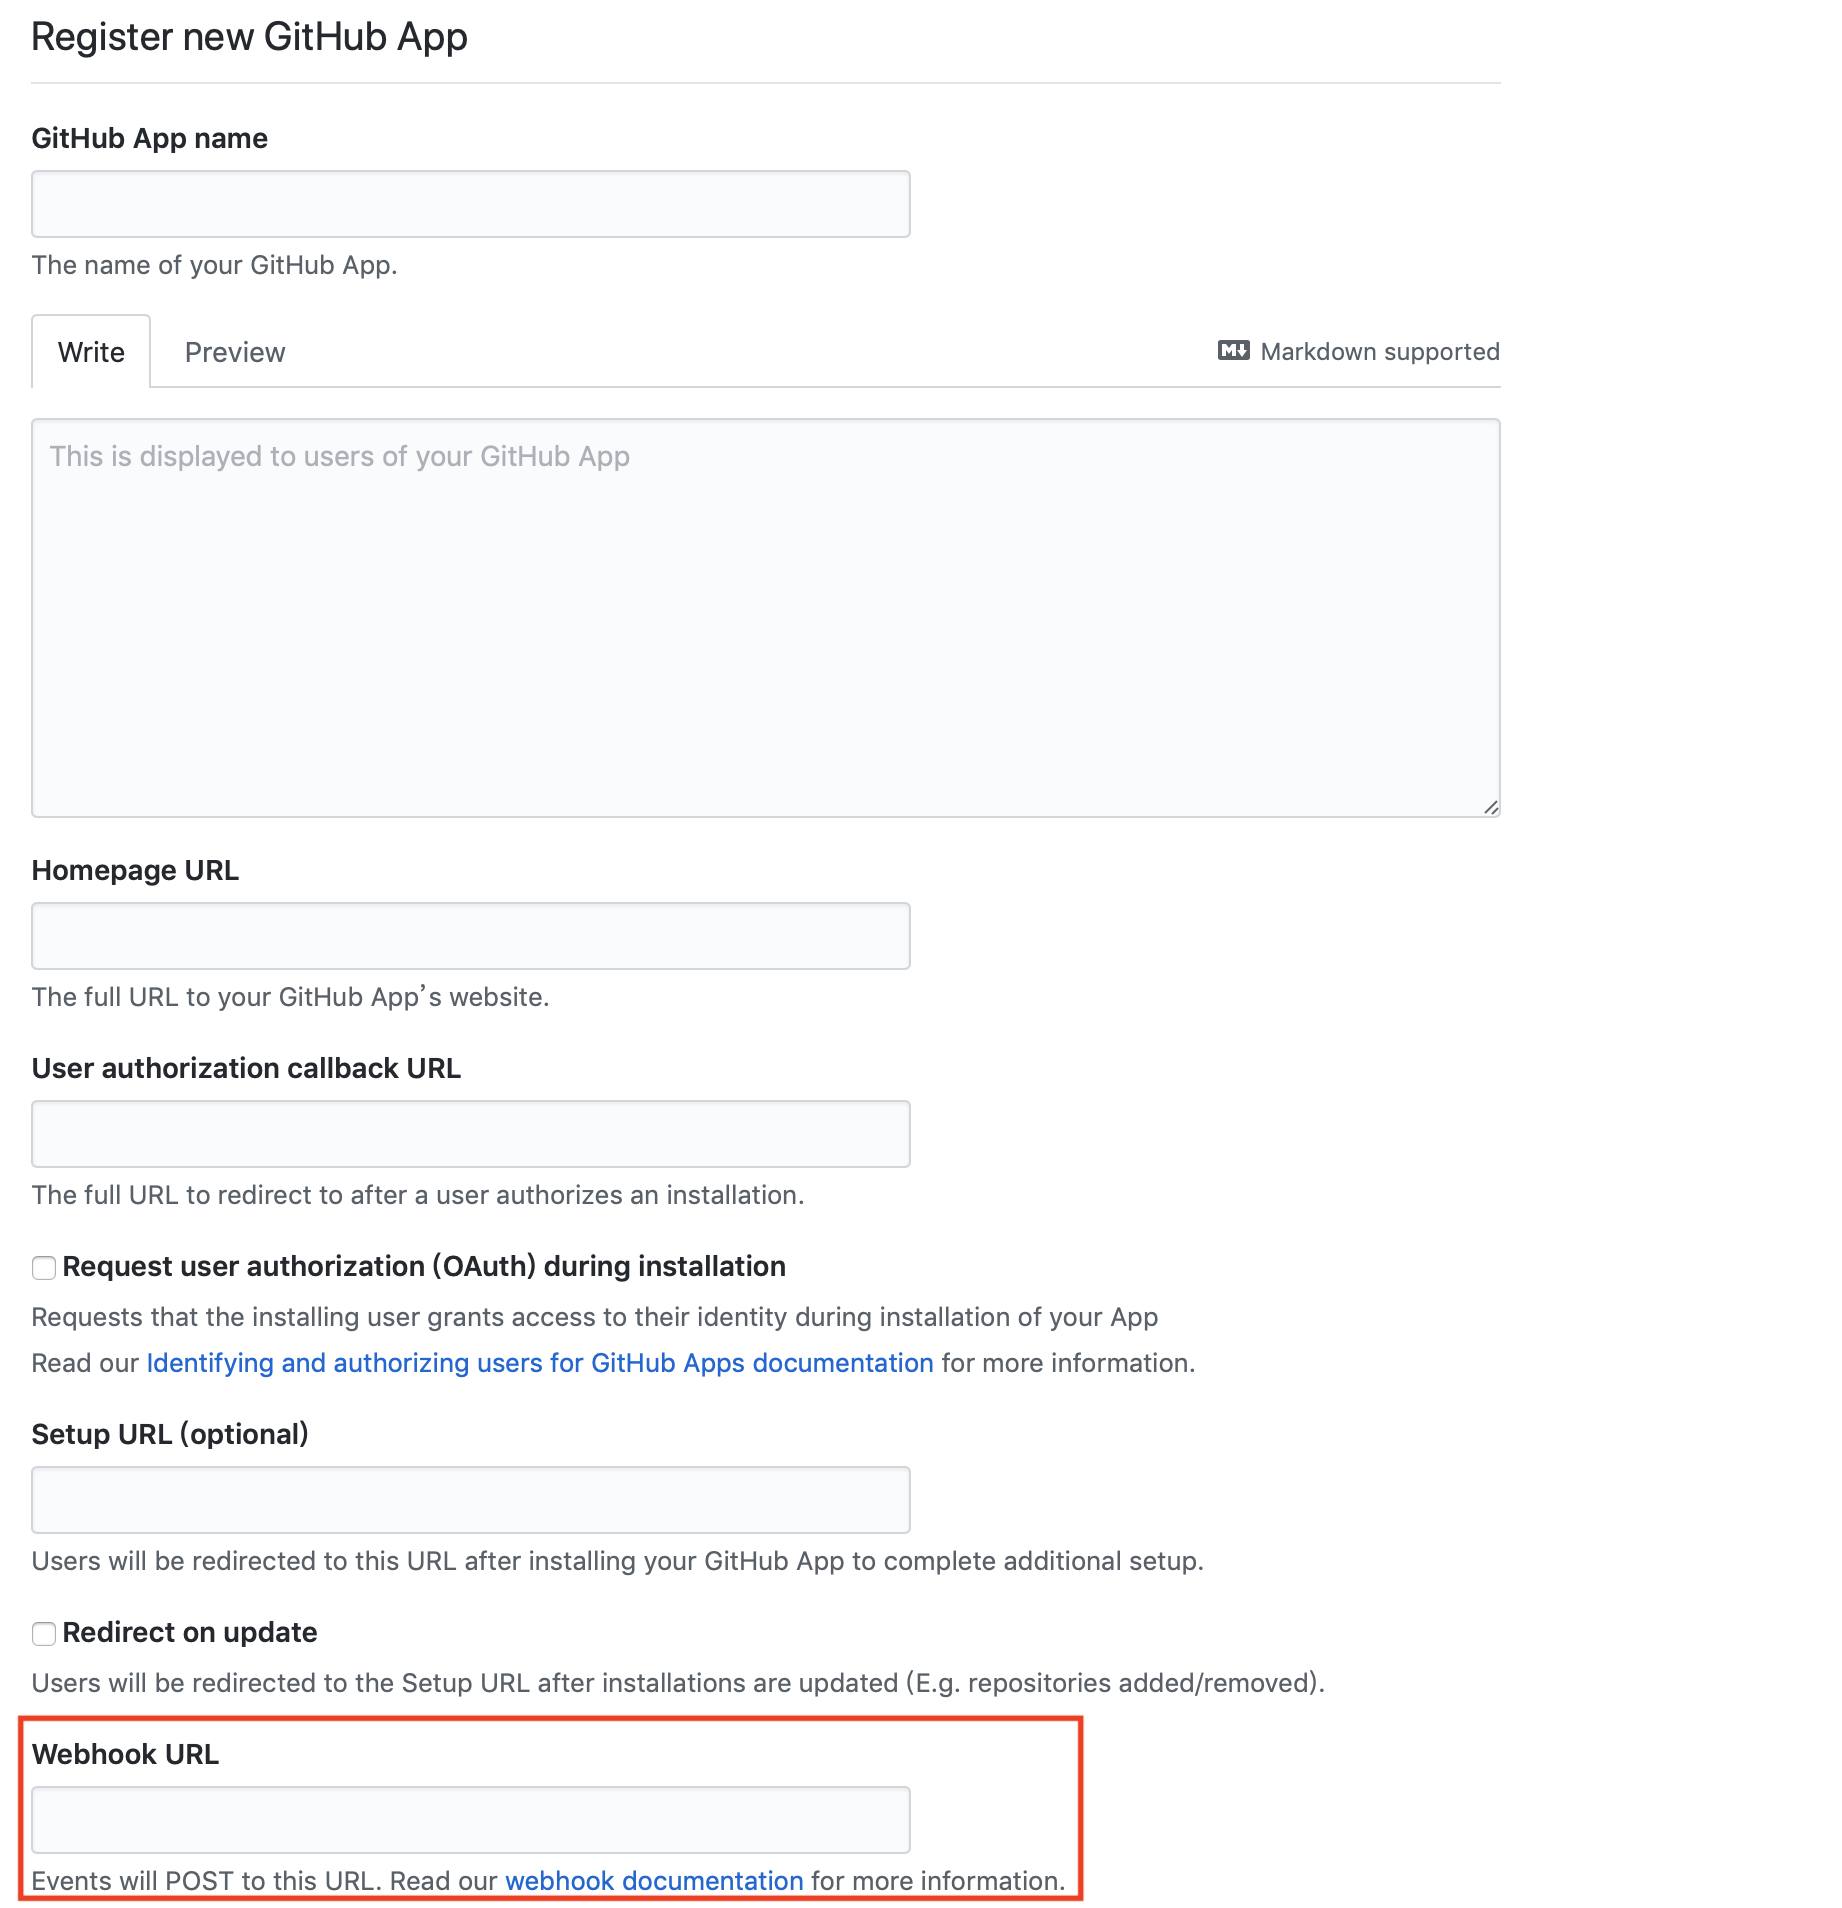
前面的信息都挺顺利的,哒哒哒敲完了,点击Create GitHub App的时候,提示途中标红的Webhook URL,这就一脸懵逼了。然后网上各种搜,最后发现创建应该是Github OAuth Application。如下图:
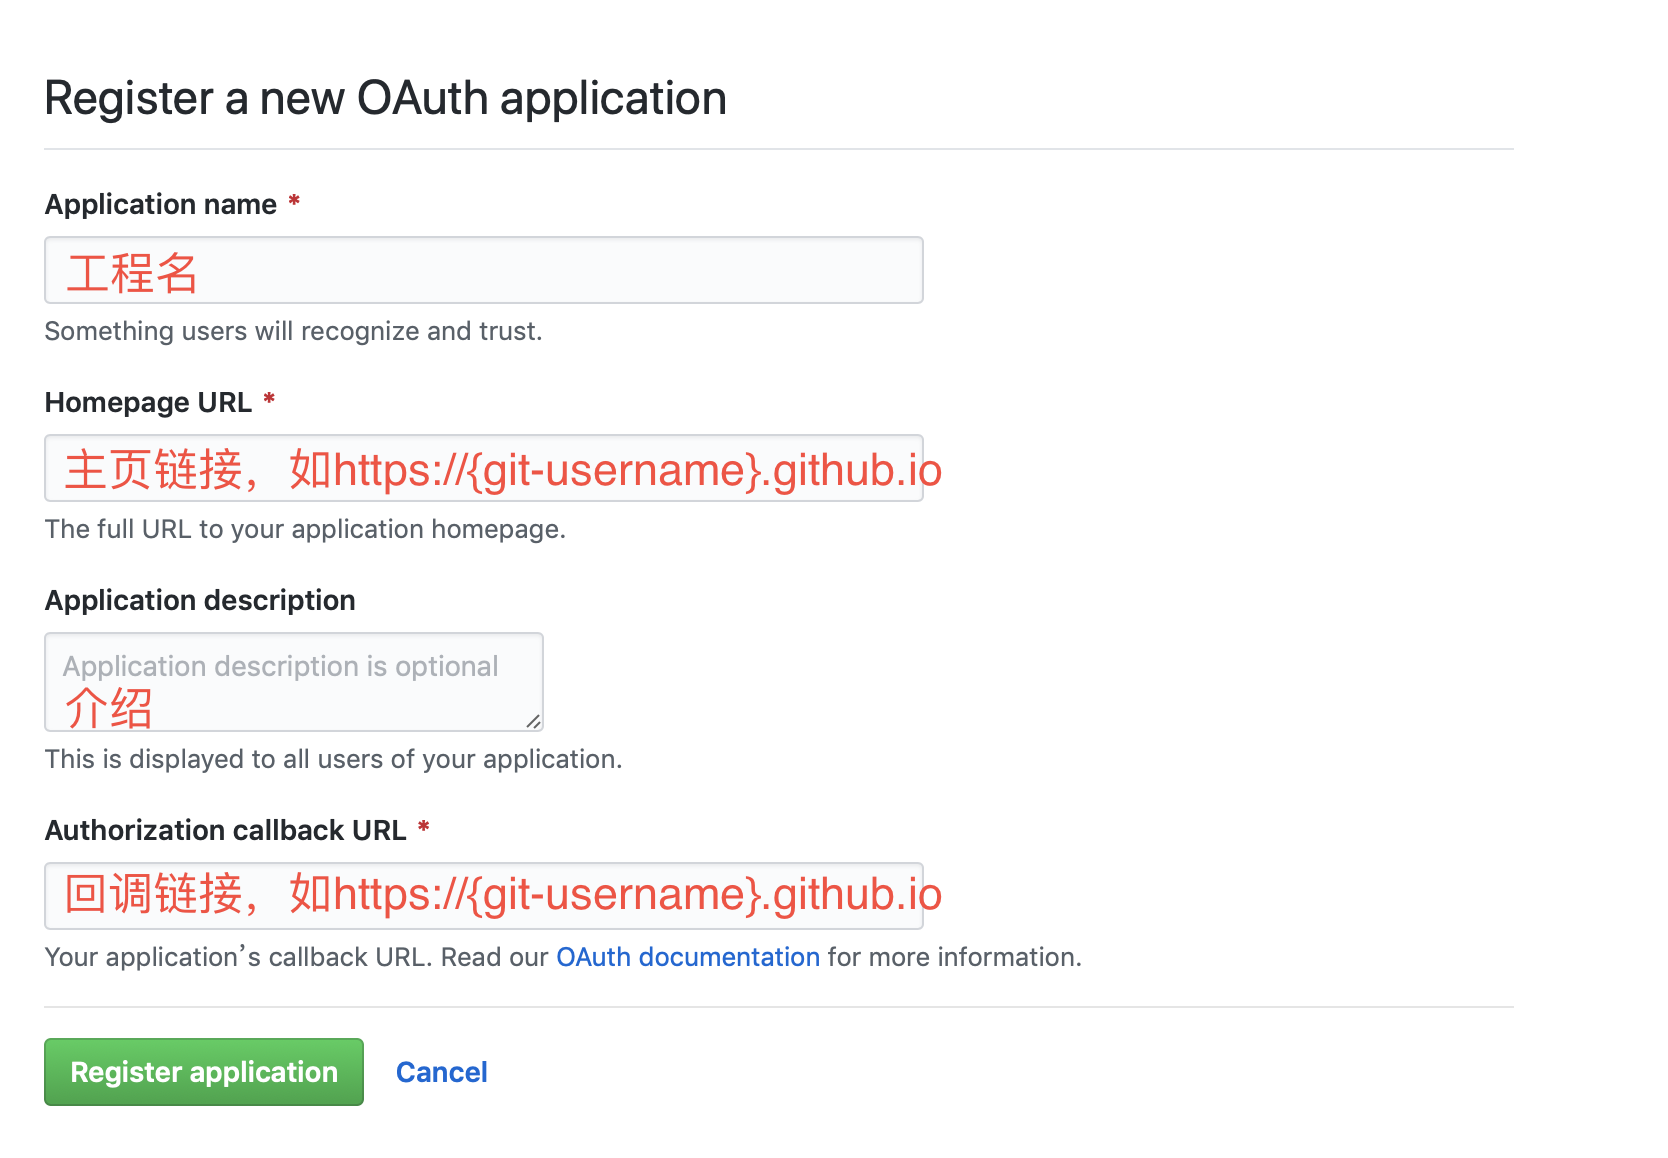
其中Client ID和Client Secret后续会用到。
添加gitalk.html模板
从网上拷贝了一份见下方, 注意这份模板是有问题的!!!本身添加评论功能是很简单的,但是这份代码增加集成了难度,下文会详细讲解。
{{ if .Site.Params.enableGitalk }}
<div id="gitalk-container/" style="border:0" ></div>
<link rel="stylesheet" href="https://unpkg.com/gitalk/dist/gitalk.css/" style="border:0" >
<script src="https://unpkg.com/gitalk/dist/gitalk.min.js/" style="border:0" ></script>
<script>
  const gitalk = new Gitalk({
    clientID: '{{ .Site.Params.Gitalk.clientID }}',
    clientSecret: '{{ .Site.Params.Gitalk.clientSecret }}',
    repo: '{{ .Site.Params.Gitalk.repo }}',
    owner: '{{ .Site.Params.Gitalk.owner }}',
    admin: ['{{ .Site.Params.Gitalk.owner }}'],
    id: location.pathname, // Ensure uniqueness and length less than 50
    distractionFreeMode: false // Facebook-like distraction free mode
  });
  (function() {
    if (["localhost", "127.0.0.1"].indexOf(window.location.hostname) != -1) {
      document.getElementById('gitalk-container').innerHTML = 'Gitalk comments not available by default when the website is previewed locally.';
      return;
    }
    gitalk.render('gitalk-container');
  })();
</script>
{{ end }}
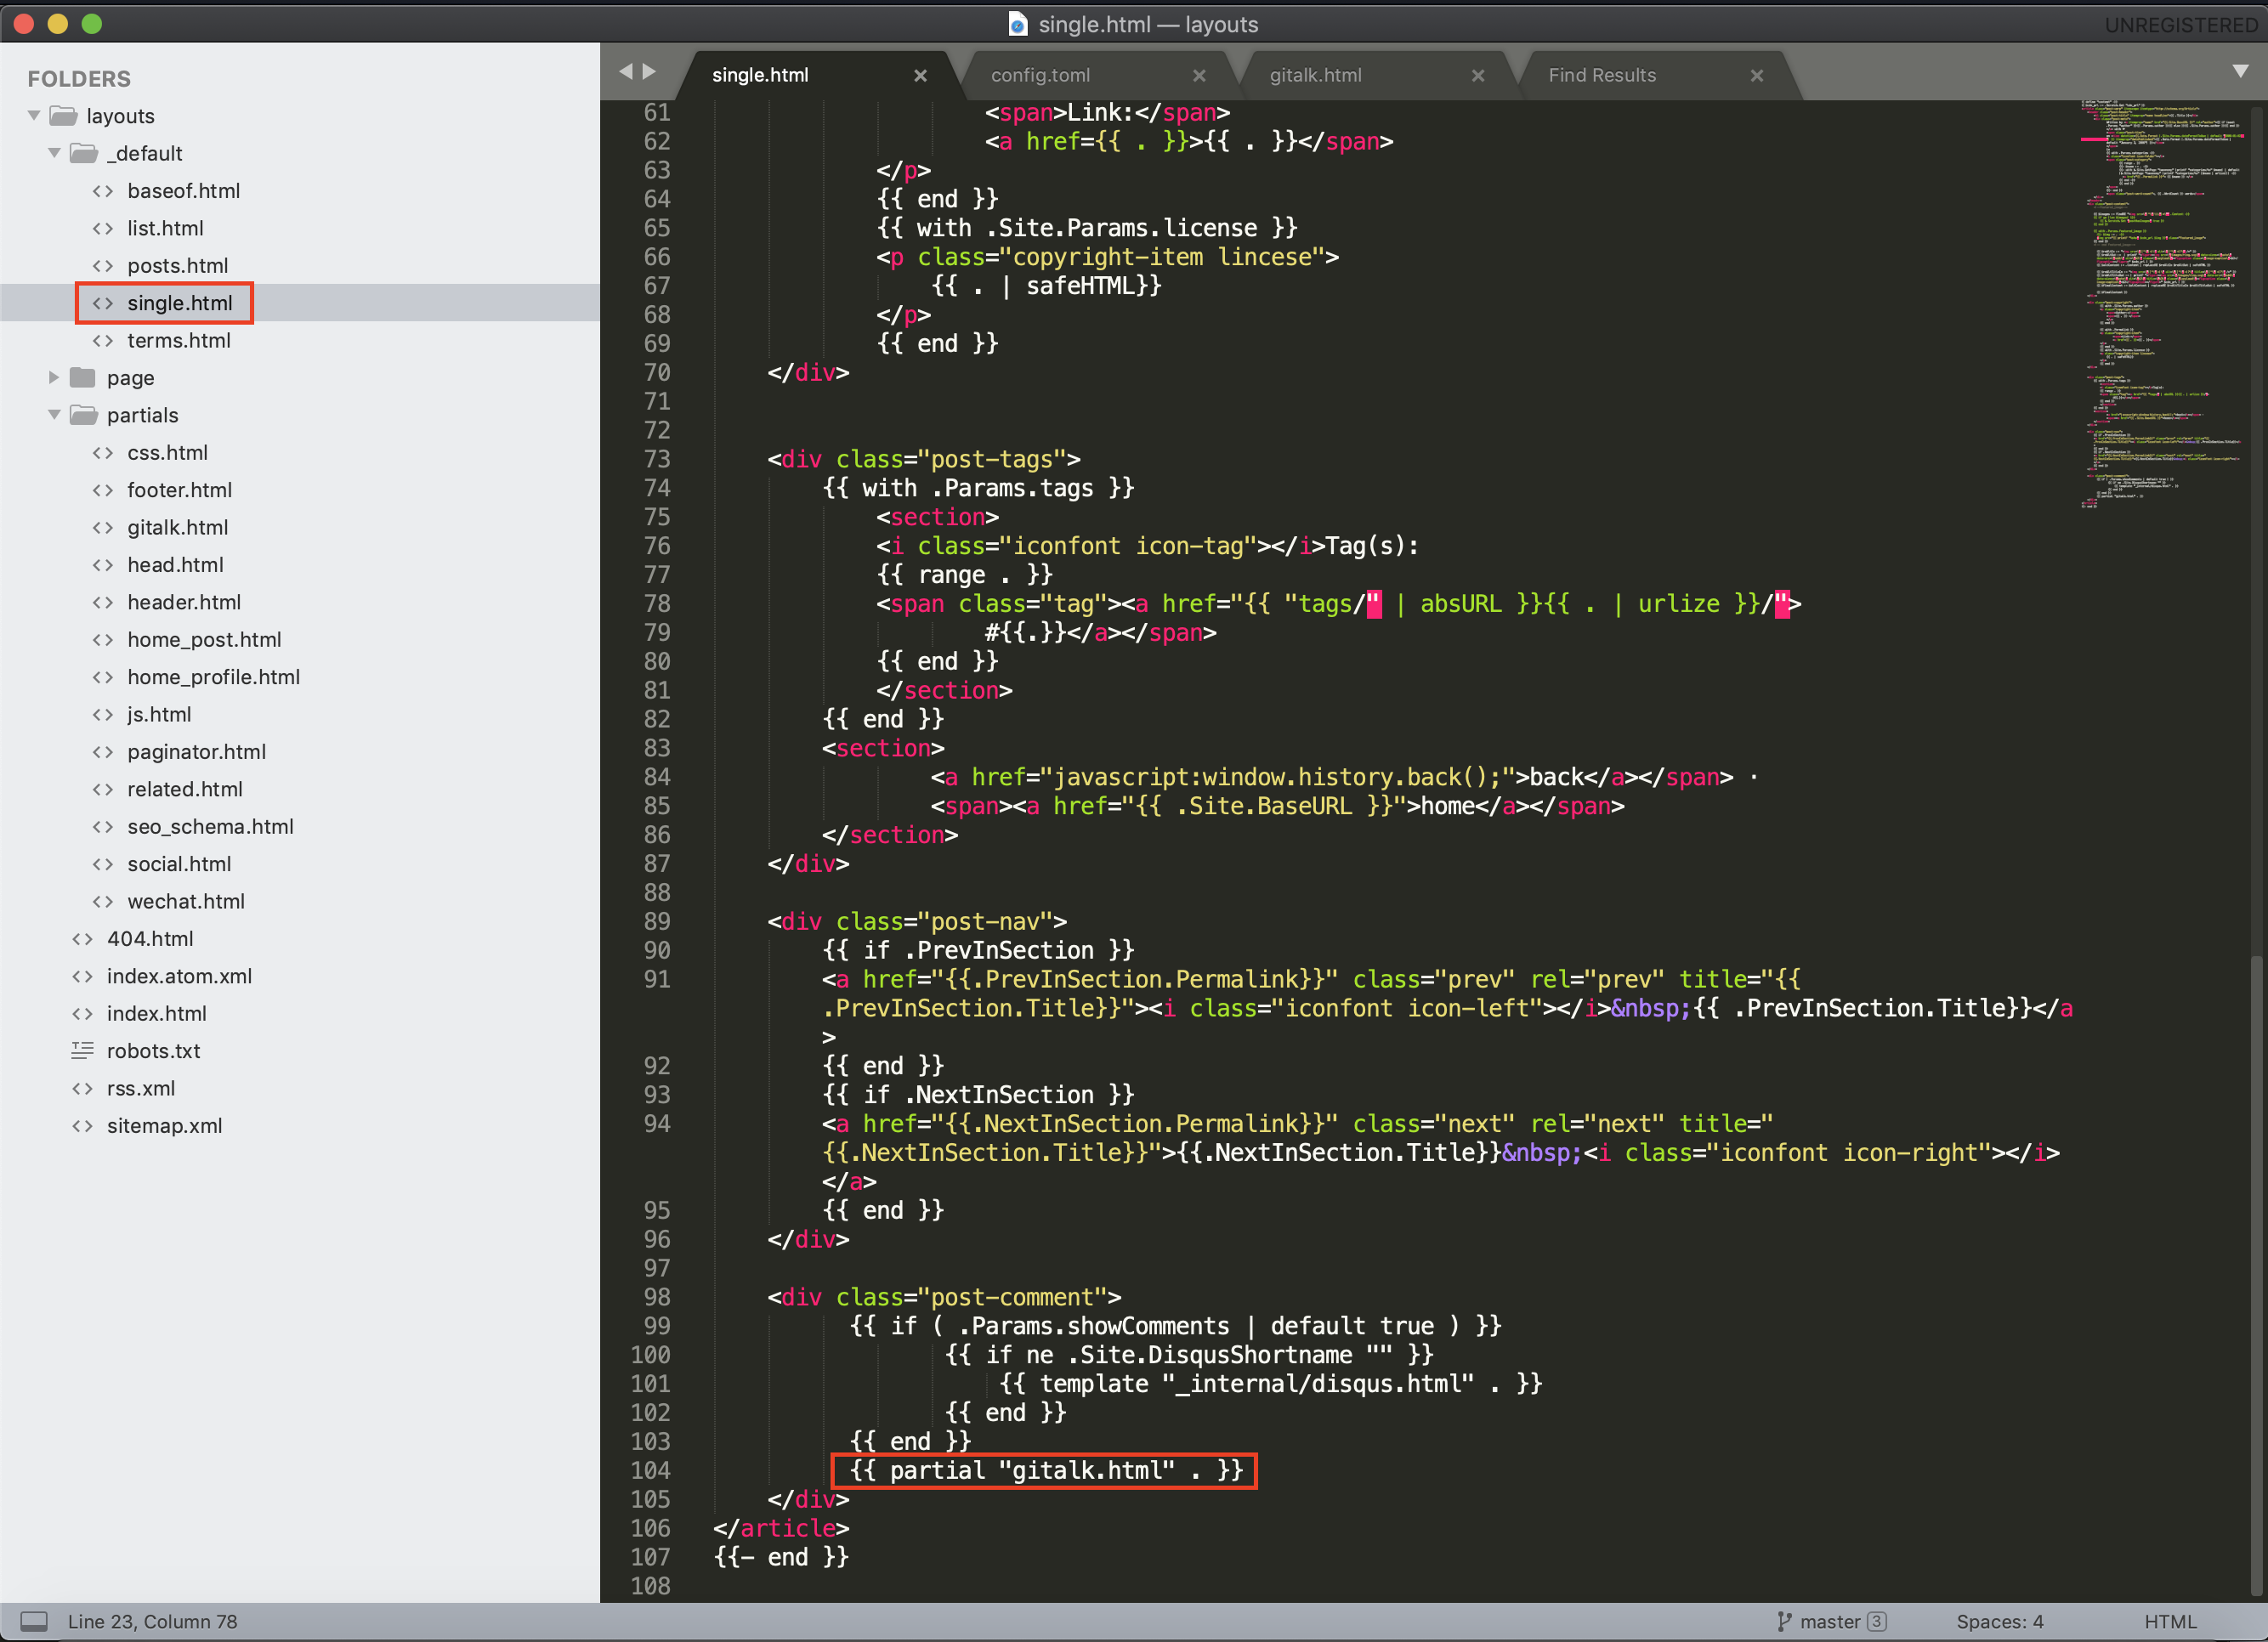
插入gitalk.html
然后在themes中对应的主题下的layout/_default/single.html 中插入{{ partial "gitalk.html" . }}
配置 config.toml
在 config.toml 中添加以下配置
##下面的参数主要是在gitalk.html会用到。通过.Site.Params.xxx获取
[params]
  enableGitalk = true
[params.gitalk]
    clientID = "[Client ID]" # [Client ID] 替换成你的Client ID
    clientSecret = "[Client Secret]" # [Client Secret] 替换成你的Client Secret
    repo = "{git-username}.github.io" # 你的Github个人主页
    owner = "{git-username}" # 你的 GitHub ID
    admin= "{git-username}" # Required. GitHub ID. Github repository owner and collaborators. (Users who having write access to this repository)

    id= "location.pathname" # The unique id of the page.
    labels= "gitalk" # Github issue labels. If you used to use Gitment, you can change it
    perPage= 15 # Pagination size, with maximum 100.
    pagerDirection= "last" # Comment sorting direction, available values are 'last' and 'first'.
    createIssueManually= false # If it is 'false', it is auto to make a Github issue when the administrators login.
    distractionFreeMode= false # Enable hot key (cmd|ctrl + enter) submit comment.
理论上截此为止,把改动推到Github上,应该就可以看到了评论功能,但是,正所谓不怕万一,就怕但是。如果按照以上流程,满怀兴奋地刷新Github主页以后,下面依然空白。
继续一脸懵逼中…
继续网上搜索,不过徒劳无功,最终打开网页调试面板,原来加载js报错了
Error: Container not found, window.document.getElementById: gitalk-container
最终定位问题在gitalk.html,下面几行改成下方那样就可以了。
<div id="gitalk-container"></div>
<link rel="stylesheet" href="https://unpkg.com/gitalk/dist/gitalk.css">
<script src="https://unpkg.com/gitalk/dist/gitalk.min.js"></script>
忐忑不安地推到GitHub,怀着试一下的心态,居然可以了,痛哭流涕啊。
第一次会提示GitHub登录,登录以后就可以用了。
心得
达到目的的成就感跟达到目的的难度成正相关。
过程越是艰苦,达到目的后成就感越高。